Basic Log4Net step-up

The following post explains how to get Log4Net working in a .NET console application.

The first step is create your console application and add references to Log4Net. The easiest way to add the correct references is via NuGet, where it is simply listed as log4net.

You’ll need to add a configuration file to tell Log4Net how you want it to log. A basic example would be:

<?xml version="1.0" encoding="utf-8" ?>
<configuration>
  
  <configSections>
    <section name="log4net" type="log4net.Config.Log4NetConfigurationSectionHandler,log4net" />
  </configSections>

  <log4net>
    <appender name="RollingFile" type="log4net.Appender.RollingFileAppender">
      <file value="Test.log" />
      <appendToFile value="true" />
      <maximumFileSize value="5000KB" />
      <maxSizeRollBackups value="50" />
      <layout type="log4net.Layout.PatternLayout">
        <conversionPattern value="%utcdate{yyyy-MM-dd HH:mm:ss.fffffff} - %level - %logger - %message%newline" />
      </layout>
    </appender>
    <root>
      <level value="DEBUG" />
      <appender-ref ref="RollingFile" />
    </root>
  </log4net>
  
</configuration>

This example simply adds a rolling log file. It’s called rolling because it starts a new log file at triggered intervals, allowing you to delete historical log files when you’ve finished with them. In this case, a new log file is started each time the current log file gets to 5000KB. It’s worth taking a look at the Log4Net documentation to find out about the different types of logging available. It is also possible to write your own appender if you want to do something not already built it to Log4Net.

In order to tell Log4Net to pick your configuration, you need to add the following to your application:

[assembly: XmlConfigurator]

The most obvious place for this is the AssemblyInfo.cs file.

This tells Log4Net to look in the default configuration file for the Log4Net configuration settings, but you can also tell Log4Net to look in another custom configuration file using the overloads available to the XmlConfigurator, although I prefer to keep all configuration in a single file.

Then it’s just a case of using the logger:

using System;
using log4net;

namespace Test
{
    public static class Program
    {
        public static void Main()
        {
            var log = LogManager.GetLogger(typeof(Program));
            log.Debug("Test console application started");

            Console.ReadLine();
        }
    }
}

Note that the LogManager returns an object implementing the ILog interface.

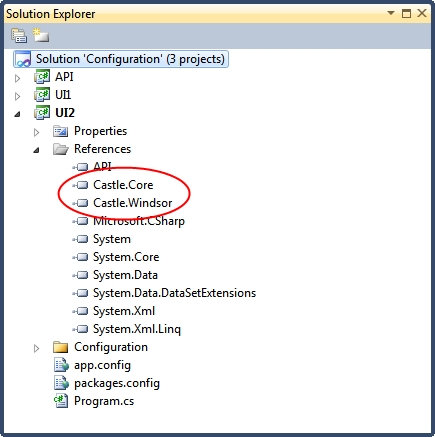
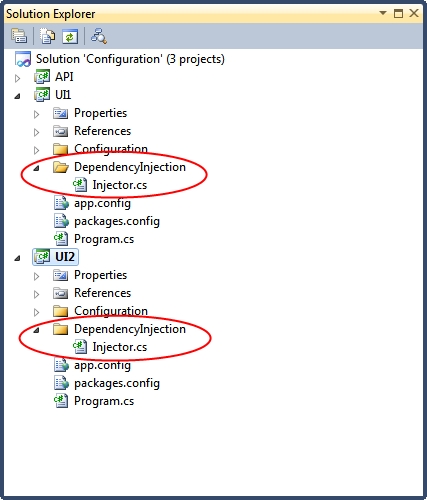
If you’re using dependency injection, you should wire up the dependency injector to return your ILog instance. The following shows how to do this if you’re using Castle Windsor:

using Castle.MicroKernel.Registration;
using Castle.Windsor;
using Castle.Windsor.Installer;
using log4net;

namespace Test
{
    public static class Injector
    {
        private static readonly object InstanceLock = new object();

        private static IWindsorContainer instance;

        public static IWindsorContainer Instance
        {
            get
            {
                lock (InstanceLock)
                {
                    return instance ?? (instance = GetInjector());
                }
            }
        }

        private static IWindsorContainer GetInjector()
        {
            var container = new WindsorContainer();

            container.Install(FromAssembly.This());

            RegisterInjector(container);
            RegisterLog(container);

            return container;
        }

        private static void RegisterInjector(WindsorContainer container)
        {
            container.Register(
                Component.For<IWindsorContainer>()
                    .Instance(container));
        }

        private static void RegisterLog(WindsorContainer container)
        {
            container.Register(
                Component.For<ILog>()
                    .Instance(LogManager.GetLogger(typeof(Injector)))
                    .LifestyleSingleton());
        }
    }
}

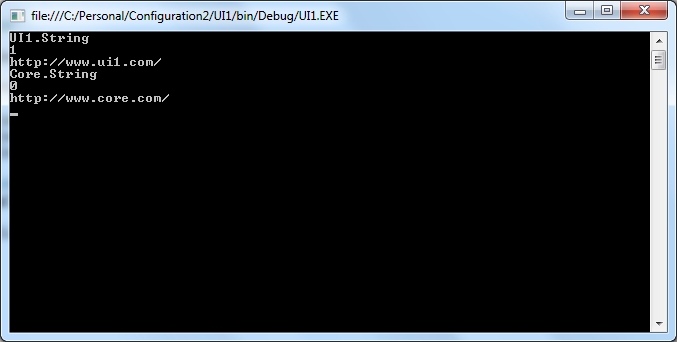
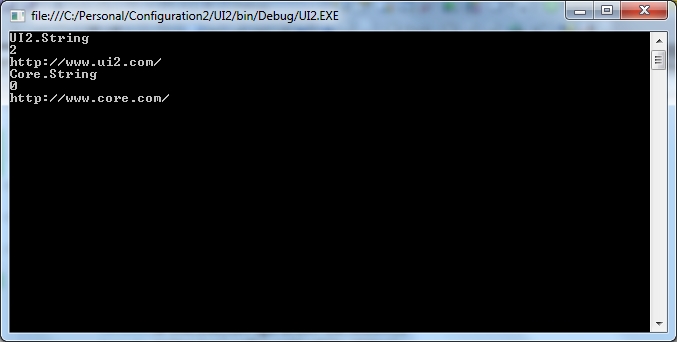
The following statement will return an ILog instance as expected:

var log = Injector.Instance.Resolve();

There you have it!

Testing Windows Services with dependency injection

Last year I wrote a post on Testing Windows Services. I pointed out that recompiling and installing your Windows Service following each change is a really inefficient way to develop and test a service. Instead, I suggest that you can run and debug your service in Visual Studio simply by wrapping the service up in a test console application.

I said that I would revisit the post for services using dependency injection, so here goes. Note that the code in this article follows on directly from the code in the previous article, so you’ll need to read the previous article in order for this to make sense!

First, a quick discussion as to how you could add dependency injection to a Windows Service:

I believe the easiest way to use dependency injection in a .NET Windows Service application is to use the dependency injection engine to inject required services into the ServiceBase.Run() method in the Program class for the service:

using System.ServiceProcess;

namespace MyService
{
    public static class Program
    {
        public static void Main()
        {
            var servicesToRun = new[] { (ServiceBase)Injector.Instance.Resolve() };
            ServiceBase.Run(servicesToRun);
        }
    }
}

In order to do this, you simply need to create an empty interface for your service, which the service implements:

namespace MyService
{
    public interface IService
    {
        // No implementation
    }
}
using System.IO;
using System.ServiceProcess;

namespace MyService
{
    public partial class Service : ServiceBase, IService
    {
        public Service()
        {
            InitializeComponent();
        }

        // Service implementation...
    }
}

My original article gave an example of a service which creates and deletes a file when it starts and stops. To complete the example, let’s extract the file interaction code out as a dependency. Here’s the interface:

namespace MyService
{
    public interface IFileCreator
    {
        void Create();
        void Delete();
    }
}

…and here’s the implementation:

using System.IO;

namespace MyService
{
    public class FileCreator : IFileCreator
    {
        public void Create()
        {
            using (var stream = new FileStream("Running", FileMode.Create, FileAccess.ReadWrite, FileShare.ReadWrite))
            {
                using (var writer = new StreamWriter(stream))
                {
                    writer.WriteLine("Running");
                    writer.Flush();
                }
            }
        }

        public void Delete()
        {
            var fileInfo = new FileInfo("Running");
            if (fileInfo.Exists)
            {
                fileInfo.Delete();
            }
        }
    }
}

The injector class for the service would then look something like this:

using Castle.MicroKernel.Registration;
using Castle.Windsor;
using Castle.Windsor.Installer;

namespace MyService
{
    public static class Injector
    {
        private static readonly object InstanceLock = new object();

        private static IWindsorContainer instance;

        public static IWindsorContainer Instance
        {
            get
            {
                lock (InstanceLock)
                {
                    return instance ?? (instance = GetInjector());
                }
            }
        }

        private static IWindsorContainer GetInjector()
        {
            var container = new WindsorContainer();

            container.Install(FromAssembly.This());

            RegisterInjector(container);
            RegisterService(container);
            RegisterFileCreator(container);

            return container;
        }

        private static void RegisterInjector(WindsorContainer container)
        {
            container.Register(
                Component.For()
                .Instance(container));
        }

        private static void RegisterService(WindsorContainer container)
        {
            container.Register(
                Component.For()
                    .ImplementedBy(typeof(Service)));
        }

        private static void RegisterFileCreator(WindsorContainer container)
        {
            container.Register(
                Component.For()
                    .ImplementedBy(typeof(FileCreator)));
        }
    }
}

Note that I’ve wired up both the service (using IService) and my new FileCreator class.

The ServiceWrapper class would be exactly as in the previous example. The only change to the wrapper console application would be to change the Program, as follows:

using System;
using MyService;

namespace MyServiceWrapper
{
    public class Program
    {
        public static void Main(string[] args)
        {
            var serviceWrapper = new ServiceWrapper();

            // Wire up service dependencies here:
            serviceWrapper.FileCreator = Injector.Instance.Resolve();

            try
            {
                serviceWrapper.TestStart();
                Console.ReadLine();
                serviceWrapper.TestStop();
            }
            catch (Exception exception)
            {
                Console.WriteLine("Error: " + exception.Message);
                Console.ReadLine();
            }
        }
    }
}

Unfortunately, in this class I’ve had to wire up all the dependencies in the ServiceWrapper manually as I haven’t found a way to do this automatically. However, this one small pain point is a significant improvement compared to compiling and installing your service each time you make a change!

Removing duplicates with LINQ in C#

Here are a couple of tricks to remove duplication using LINQ.

Firstly, for simple lists:

var numbersWithDuplicates = new[] { "One", "Two", "Two", "Three", "Four" };
var numbers = numbersWithDuplicates.GroupBy(x => x).Select(group => group.First());

…and secondly for more complex objects:

public class Person
{
    public int Id { get; set; }
    public string Name { get; set; }
    public int Age { get; set; }
}

…you can de-duplicate using any property you like:

var peopleWithDuplicates = new[]
{
    new Person { Id = 2, Name = "Alice", Age = 29 },
    new Person { Id = 1, Name = "Bob", Age = 30 },
    new Person { Id = 3, Name = "Claire", Age = 31 },
    new Person { Id = 4, Name = "Bob", Age = 50 },
};
var people = peopleWithDuplicates.GroupBy(x => x.Name).Select(group => group.First());

Prevent malicious image uploads

If you allow users to upload images to your site, you may be opening up your site to malicious use. This is because particularly cunning hackers can hide commands to do just about anything in the data that makes up the image.

For a great example of an infected image file, see the following page:

http://www.eicar.org/86-0-Intended-use.html

Note that you’ll need to disable your anti-virus if you want to create this file on your computer.

If you allow users to upload this file, it will produce some interesting results!

To prevent the vulnerability (at least when using C#) you simply need to try and load the image data into an Image object. This will throw an exception if the image contains anything nasty. Here is an example:

var image = Image.FromStream(imageDataStream);
using (var memoryStream = new MemoryStream())
{
    image.Save(memoryStream, ImageFormat.Png);
}

Note that you’ll need to load the uploaded data into a stream (imageDataStream in the example above) to get this to work.

Using the Return key with Back and Next buttons on web-sites

When it boils down to it, most sites on the web are just gloried data crunchers. Users enter information, which the system churns up and splits out again at some point in the future, potentially to a different user.

If a site requires a lot of information, it is common to see multistage wizards, with each stage asking for a small portion of the information. Each stage usually has a Back button and a Next button. Convention and common sense dictate that the Back button should be on the left, and the Next button on the right as in the following example:

Type something here:
… and here:

NB: The onclick events return false to prevent the page from actually submitting.

This all seems to works fantastically, and even uses tabindex to ensure that the user tabs onto the Next button before the Back button… until someone comes along that prefers to use the Return key to submit the form, instead of using the mouse or tabbing to the Next button. In this case, the Return key will call the first submit button it can find, which in this case is the Back button. This is not the expected behaviour! Put the cursor in one of the input fields and click Return to see this in action.

One solution to correct this would be to use floats and/or JavaScript to try and reverse the order the buttons are displayed in while still having the Next button placed highest in the HTML to ensure that it would respond to the Return key. However, if a user disables CSS and/or JavaScript this solution will fail. A simpler option is to create a hidden submit button as the first element within the form, which performs the desired Return key operation. The order of any other (visible) buttons on the form is then irrelevant.

The following form demonstrates this:

Type something here:
… and here:

Again, put the cursor in one of the input fields and click Return to see this in action. The only downside to this is that the user will see another submit button if they disable CSS, but in most cases I think it is still the best solution.

Basic fluent interface

Fluent interfaces seem to be everywhere these days, probably because they can be used to produce highly readable code. They use method cascading/chaining to achieve this, whereby method calls are made one after another on the same object reference.

Good examples are the LINQ component in .NET and Fluent NHibernate, obviously!

Here is a really simple example to demonstrate how you would go about writing a fluent API, in which values can be added to or subtracted from a numeric value. This is encapsulated in a Number class:

public class Number
{
    private int currentValue;

    public Number(int value = 0)
    {
        currentValue = value;
    }

    public int Value
    {
        get
        {
            return currentValue;
        }
    }

    public Number Add(int value)
    {
        currentValue += value;
        return this;
    }

    public Number Subtract(int value)
    {
        currentValue -= value;
        return this;
    }
}

Note that each of the chained methods returns the current instance, via the this keyword.

The Number class can be used as follows:

public static class Program
{
    public static void Main()
    {
        var number = new Number();
        
        number.Add(1).Add(2).Add(3);
        Console.WriteLine(number.Value);

        number.Subtract(4).Subtract(1).Add(2);
        Console.WriteLine(number.Value);

        Console.ReadLine();
    }
}

As an aside, adding the ability to multiply and divide would significantly increase the complexity of this class, since the order of operations would need to be taken into account.

However, hopefully my example shows how fluent APIs are put together.

Simple trick to help prevent click-jacking

Click-jacking is a technique used by hackers to get you to interact with websites without your consent or knowledge. An example would be to get you to click a Like button on a Facebook page without you realising it. The trick with click-jacking is misdirection. One way to achieve this is to show you a friendly looking site, preferably a site which you are already familiar with, but where the buttons perform actions other than those you expect. This can be achieved by hosting the friendly site in an iframe, with fake buttons floated over the top of the real buttons. These fake buttons can then perform unintended actions, such as submitting a Like to Facebook.

You can test whether your website is vulnerable using the following HTML snippet:

<html>
<head>
<title>Clickjack test page</title>
</head>
<body>
<p>Website is vulnerable to clickjacking!</p>
<iframe src="http://www.mywebsite.com" width="1000" height="1000"></iframe>
</body>
</html>

If you can see the text Website is vulnerable to clickjacking! when you look at the code in a browser your site could be used as a target for click-jacking.

A simple way to prevent this kind of attack is to include the following JavaScript at the top of your site:

<script type="text/javascript">
// Prevent the page from being vulnerable to click jacking
if (self == top) {
var theBody = document.getElementsByTagName('body')[0];
theBody.style.display = "block";
} else {
top.location = self.location;
}
</script>

The JavaScript checks to see if the containing page is the top-most entity in the HTML served to the user. If not, then the whole browser is re-directed to the address of the containing page, thus removing the iframe.

Obviously this won’t work if users don’t have JavaScript enabled, but for the sake of a few lines of trivial JavaScript it’s worth adding this to your site.

Ignore SSL errors when calling web-services in C#

Often when developing .NET systems that call secure web-services, I find myself running code against development and test servers with invalid SSL certificates. This causes service calls to fail and prevents me from making progress. To get round this potential blocker, I include the following snippet somewhere in the code before the service call is made:

ServicePointManager.ServerCertificateValidationCallback = delegate { return true; };

This code only needs to appear once, and it is not good practice to leave it in production code as it means that data sent over HTTPS isn’t actually secure. Consider making the inclusion of this code configurable, or wrap it up in #DEBUG statements so that it is not compiled into production code.

NHibernate NullableDateTime custom type

NHibernate doesn’t support mappings for nullable DateTime types by default. Fortunately, this is easy to implement using the IUserType interface. To demonstrate this, create a new Console Application project and add FluentNHibernate using NuGet. Then add the following class:

using System;
using System.Data;
using NHibernate;
using NHibernate.SqlTypes;
using NHibernate.UserTypes;

namespace UserTypes
{
    /// <summary>
    /// Type to allow NHibernate to persist DateTime? objects
    /// </summary>
    public class NullableDateTimeType : IUserType
    {
        /// <summary>
        /// Gets a value indicating whether the value is mutable
        /// </summary>
        public bool IsMutable
        {
            get
            {
                // This item is immutable:
                return false;
            }
        }

        /// <summary>
        /// Gets the type returned by NullSafeGet()
        /// </summary>
        public Type ReturnedType
        {
            get
            {
                return typeof(DateTime?);
            }
        }

        /// <summary>
        /// Gets the SQL types for the columns mapped by this type. 
        /// </summary>
        public SqlType[] SqlTypes
        {
            get
            {
                return new[]
                {
                    new SqlType(DbType.DateTime)
                };
            }
        }

        /// <summary>
        /// Reconstruct an object from the cacheable representation. At the very least this method should perform a deep copy if the type is mutable.
        /// </summary>
        /// <param name="cached">The cached object</param>
        /// <param name="owner">The owner object</param>
        /// <returns>The assemled object</returns>
        public object Assemble(object cached, object owner)
        {
            // Used for caching. As our object is immutable we can return as is:
            return cached;
        }

        /// <summary>
        /// Return a deep copy of the persistent state, stopping at entities and at collections. 
        /// </summary>
        /// <param name="value">The item to copy</param>
        /// <returns>The copied item</returns>
        public object DeepCopy(object value)
        {
            // We deep copy the item by creating a new instance with the same contents.
            // Note that this happens for free with value types because of the way 
            // that method parameters work:
            if (value == null)
            {
                return null;
            }

            return value as DateTime?;
        }

        /// <summary>
        /// Transform the object into its cacheable representation. At the very least this method should perform a deep copy 
        /// if the type is mutable. That may not be enough for some implementations, however; for example, associations must 
        /// be cached as identifier values.
        /// </summary>
        /// <param name="value">The cached object</param>
        /// <returns>The dassassemled object</returns>
        public object Disassemble(object value)
        {
            // Used for caching. As our object is immutable we can return as is:
            return value;
        }

        /// <summary>
        /// Compare two instances of the class mapped by this type for persistent "equality" ie. equality of persistent state 
        /// </summary>
        /// <param name="x">The first item</param>
        /// <param name="y">The second item</param>
        /// <returns>A value indicating whether the items are equal</returns>
        public new bool Equals(object x, object y)
        {
            if (x == null && y == null)
            {
                return true;
            }

            if (x == null)
            {
                return false;
            }

            return x.Equals(y);
        }

        /// <summary>
        /// Get a hashcode for the instance, consistent with persistence "equality" 
        /// </summary>
        /// <param name="x">The value to get the hash code for</param>
        /// <returns>The hash code</returns>
        public int GetHashCode(object x)
        {
            if (x == null)
            {
                return 0;
            }

            return x.GetHashCode();
        }

        /// <summary>
        /// Retrieve an instance of the mapped class from a resultset. Implementors should handle possibility of null values. 
        /// </summary>
        /// <param name="rs">The reader</param>
        /// <param name="names">The item names</param>
        /// <param name="owner">The owner object</param>
        /// <returns>The object requested</returns>
        public object NullSafeGet(IDataReader rs, string[] names, object owner)
        {
            // We get the DateTime from the database using the NullSafeGet used to get strings from NHibernateUtil:
            return NHibernateUtil.DateTime.NullSafeGet(rs, names[0]) as DateTime?;
        }

        /// <summary>
        /// Write an instance of the mapped class to a prepared statement. Implementors should handle possibility of null values. A multi-column type should be written to parameters starting from index. 
        /// </summary>
        /// <param name="cmd">The command</param>
        /// <param name="value">The value to use</param>
        /// <param name="index">The index to set</param>
        public void NullSafeSet(IDbCommand cmd, object value, int index)
        {
            // Convert to the correct type and set:
            var dateTimeValue = value as DateTime?;

            if (dateTimeValue == null)
            {
                NHibernateUtil.DateTime.NullSafeSet(cmd, null, index);
            }
            else
            {
                NHibernateUtil.DateTime.NullSafeSet(cmd, dateTimeValue.Value, index);
            }
        }

        /// <summary>
        /// During merge, replace the existing (target) value in the entity we are merging to with a new (original) 
        /// value from the detached entity we are merging. For immutable objects, or null values, it is safe to 
        /// simply return the first parameter. For mutable objects, it is safe to return a copy of the first parameter. 
        /// For objects with component values, it might make sense to recursively replace component values. 
        /// </summary>
        /// <param name="original">The original value</param>
        /// <param name="target">The target value</param>
        /// <param name="owner">The owner object</param>
        /// <returns>The replacement object</returns>
        public object Replace(object original, object target, object owner)
        {
            // As our object is immutable we can just return the original  
            return original;
        }
    }
}

This class is responsible for telling NHibernate how to save and retrieve nullable DateTime values. The following demonstrates how this class can be used.

Given a class with a nullable DateTime property:

using System;

namespace UserTypes
{
    public class Student
    {
        public int Id { get; set; }
        public string FirstName { get; set; }
        public string LastName { get; set; }
        public DateTime? GraduationDate { get; set; }
    }
}

…the mapping would be as follows:

using FluentNHibernate.Mapping;
using UserTypes;

public class StudentMapping : ClassMap<Student>
{
    public StudentMapping()
    {
        Not.LazyLoad();
        Id(x => x.Id).GeneratedBy.Identity();
        Map(x => x.FirstName).Length(20).Not.Nullable();
        Map(x => x.LastName).Length(20).Not.Nullable();
        Map(x => x.GraduationDate).Nullable().CustomType(x => typeof(NullableDateTimeType));
    }
}

This can be tested by adding the following code to the Program class:

using System;
using FluentNHibernate.Cfg;
using FluentNHibernate.Cfg.Db;
using NHibernate.Cfg;
using NHibernate.Tool.hbm2ddl;

namespace UserTypes
{
    public static class Program
    {
        public static void Main()
        {
            var connectionString = "Data Source=(local);Initial Catalog=StudentTest;Integrated Security=True;Pooling=False";

            var sessionFactory = Fluently.Configure()
                .Database(MsSqlConfiguration.MsSql2008.ConnectionString(connectionString).ShowSql())
                .ExposeConfiguration(BuildSchema)
                .Mappings(x => x.FluentMappings.AddFromAssemblyOf<Student>())
                .BuildSessionFactory();

            // Create the session:
            using (var session = sessionFactory.OpenSession())
            {
                session.SaveOrUpdate(new Student { FirstName = "Not", LastName = "Graduated" });
                session.SaveOrUpdate(new Student { FirstName = "Already", LastName = "Graduated", GraduationDate = new DateTime(2000, 1, 1) });
            }

            using (var session = sessionFactory.OpenSession())
            {
                var students = session.QueryOver<Student>().List();
                foreach (var student in students)
                {
                    Console.WriteLine("{0} {1} {2}", student.FirstName, student.LastName, student.GraduationDate);
                }
            }

            Console.ReadLine();
        }

        private static void BuildSchema(Configuration configuration)
        {
            new SchemaExport(configuration).Create(false, true);
        }
    }
}

Note that the code above assumes there is a local instance of SQL Server running, with a database called StudentTest accessible using integrated authentication.

Running the code creates the following table, which includes a DateTime field that accepts null values as required:

NHibernateNullableDateTime01

…inserts the following data:

NHibernateNullableDateTime02

…and outputs the following:

NHibernateNullableDateTime03

This proves that the mapping can be used to store and retrieve null and non-null DateTime values as required.

Encapsulated and strongly-typed access to .NET configuration files with dependency injection

This article builds on a previous post entitled Encapsulated and strongly-typed access to .NET configuration files. In this example I’ll be adding dependency injection using Castle Windsor.

As per my previous post, the code for this example is in GitHub, here:

https://github.com/stevebarker333/Injected-Encapsulated-Strongly-Typed-Configuration-Files

In this post I’ll assume that you’ve read the previous post, and that you have the existing code base as a starting point. The first step then, is to add Castle Windsor to the project using NuGet. This adds references to each project as follows:

ConfigurationDependencyInjection01

Since dependency injection works by resolving interfaces to types, each encapsulated ConfigurationFile will need to be given an interface by adding IConfigurationFile to each of the two UI projects:

ConfigurationDependencyInjection02

These new interfaces need contain only the properties that are unique to each UI. Access to core properties is achieved via the ICoreConfiguration, as follows:

UI1.Configuration.ConfigurationFile:

using System;
using API.Configuration;

namespace UI1.Configuration
{
    public interface IConfigurationFile : ICoreConfiguration
    {
        string UI1String { get; }
        int UI1Int { get; }
        Uri UI1Uri { get; }
    }
}

UI2.Configuration.ConfigurationFile

using System;
using API.Configuration;

namespace UI2.Configuration
{
    public interface IConfigurationFile : ICoreConfiguration
    {
        string UI2String { get; }
        int UI2Int { get; }
        Uri UI2Uri { get; }
    }
}

The definitions of the ConfigurationFile classes in each UI project need to be adjusted to include these new interfaces, as follows:

public class ConfigurationFile : 
    API.Configuration.ConfigurationFile, IConfigurationFile, 
    API.Configuration.ICoreConfiguration
{
    ...
}

Each UI then gets its own Injector class:

ConfigurationDependencyInjection03

…containing the following code:

UI1.DependencyInjection.Injector:

using API.Configuration;
using Castle.MicroKernel.Registration;
using Castle.Windsor;
using Castle.Windsor.Installer;
using UI1.Configuration;
using API;

namespace UI1.DependencyInjection
{
    public static class Injector
    {
        private static readonly object InstanceLock = new object();

        private static IWindsorContainer instance;

        public static IWindsorContainer Instance
        {
            get
            {
                lock (InstanceLock)
                {
                    return instance ?? (instance = GetInjector());
                }
            }
        }

        private static IWindsorContainer GetInjector()
        {
            var container = new WindsorContainer();

            container.Install(FromAssembly.This());

            RegisterInjector(container);
            RegisterConfiguration(container);
            RegisterWidget(container);

            return container;
        }

        private static void RegisterInjector(WindsorContainer container)
        {
            container.Register(
                Component.For<IWindsorContainer>()
                .Instance(container));
        }

        private static void RegisterConfiguration(WindsorContainer container)
        {
            container.Register(
                Component.For<IConfigurationFile, ICoreConfiguration>()
                .ImplementedBy(typeof(Configuration.ConfigurationFile))
                .LifeStyle.Singleton);
        }

        private static void RegisterWidget(WindsorContainer container)
        {
            container.Register(
                Component.For<IWidget>()
                .ImplementedBy(typeof(Widget))
                .LifeStyle.Singleton);
        }
    }
}

UI2.DependencyInjection.Injector:

using API.Configuration;
using Castle.MicroKernel.Registration;
using Castle.Windsor;
using Castle.Windsor.Installer;
using UI2.Configuration;
using API;

namespace UI2.DependencyInjection
{
    public static class Injector
    {
        private static readonly object InstanceLock = new object();

        private static IWindsorContainer instance;
        
        public static IWindsorContainer Instance
        {
            get
            {
                lock (InstanceLock)
                {
                    return instance ?? (instance = GetInjector());
                }
            }
        }

        private static IWindsorContainer GetInjector()
        {
            var container = new WindsorContainer();

            container.Install(FromAssembly.This());

            RegisterInjector(container);
            RegisterConfiguration(container);
            RegisterWidget(container);

            return container;
        }

        private static void RegisterInjector(WindsorContainer container)
        {
            container.Register(
                Component.For<IWindsorContainer>()
                .Instance(container));
        }

        private static void RegisterConfiguration(WindsorContainer container)
        {
            container.Register(
                Component.For<IConfigurationFile, ICoreConfiguration>()
                .ImplementedBy(typeof(Configuration.ConfigurationFile))
                .LifeStyle.Singleton);
        }

        private static void RegisterWidget(WindsorContainer container)
        {
            container.Register(
                Component.For<IWidget>()
                .ImplementedBy(typeof(Widget))
                .LifeStyle.Singleton);
        }
    }
}

Note that the technique described in my post entitled Allowing Castle Windsor to resolve two interfaces to the same instance allows the ConfigurationFile type to be accessed using both the API interface ICoreConfiguration and each of the UI interfaces, IConfigurationFile. Note also that the Widget is registered with the dependency injector. This requires some small changes to the Widget and the creation of an interface, IWidget:

using System;
using API.Configuration;

namespace API
{
    public class Widget : IWidget
    {
        public ICoreConfiguration Configuration { get; set; }

        public void DoSomething()
        {
            Console.WriteLine(Configuration.CoreString);
            Console.WriteLine(Configuration.CoreInt);
            Console.WriteLine(Configuration.CoreUri);
        }
    }
}
namespace API
{
    public interface IWidget
    {
        void DoSomething();
    }
}

Finally, we change the Program classes in the console applications to use the injector, as follows:

using System;
using UI1.Configuration;
using API;
using UI1.DependencyInjection;

namespace UI1
{
    public static class Program
    {
        public static void Main()
        {
            var configurationFile = Injector.Instance.Resolve<IConfigurationFile>();

            Console.WriteLine(configurationFile.UI1String);
            Console.WriteLine(configurationFile.UI1Int);
            Console.WriteLine(configurationFile.UI1Uri);

            var widget = Injector.Instance.Resolve<IWidget>();
            widget.DoSomething();

            Console.ReadLine();
        }
    }
}
using System;
using UI2.Configuration;
using API;
using UI2.DependencyInjection;

namespace UI2
{
    public static class Program
    {
        public static void Main()
        {
            var configurationFile = Injector.Instance.Resolve<IConfigurationFile>();

            Console.WriteLine(configurationFile.UI2String);
            Console.WriteLine(configurationFile.UI2Int);
            Console.WriteLine(configurationFile.UI2Uri);

            var widget = Injector.Instance.Resolve<IWidget>();
            widget.DoSomething();

            Console.ReadLine();
        }
    }
}

Since the Widget class contains a property called Configuration of type ICoreConfiguration, the dependency injection engine can simply load the correct configuration file object in at run-time, and everything “just works”. Running the application gives exactly the same outputs as the previous non-injected example which means the spirit of the original code has been kept the same:

ConfigurationDependencyInjection04

ConfigurationDependencyInjection05

So, as always, adding dependency injection involves a bit more work, but the benefits (non-brittle, highly testable code to name just two) far outweigh the extra time required.